Tuesday, January 15, 2013

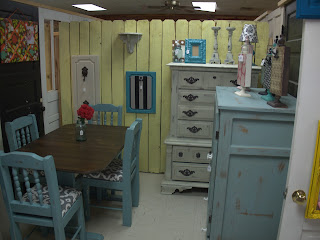
Although painting furniture is a lot of work and doesn't seem worth it at times, it has become a little bit of an obsession of mine.  It's so fun to go shopping at thrift stores, garage sales, flea markets and new things to fix up.  I have a booth at a store called The Bees Knees, which is located in Searcy, Arkansas.  My husband and I moved here for him to attend Physicians Assistant School and we have loved it.  While he's busy studying into late hours of the night, I do my painting.  Jodie, the owner of this store has created a Facebook page with a TON of cute furniture ideas.  Right now she is giving away an adorable piece of furniture if you share it on Facebook   You just have to live close enough to be able to pick it up.  If you can't enter the giveaway you should at least check out the Facebook page cause there are so many adorable ideas!


Here's the piece of furniture she's giving away

Thursday, January 10, 2013

How To Refinish a Kitchen Table

I recently bought a new orbital sander, which I love!  Since I got it, I've been obsessed with sanding and staining everything.  I found this old table for $40 at a garage sale and it sat in my garage for about 6 months taking up way too much space.  Sometimes I buy things that I never get in the mood to paint, and this was one of those things.  I finally got the motivation to do it, and I'm happy with how it turned out. 


This is what I started with.  I forgot to take a picture before I painted two of the chairs, but you get the idea of the ugliness of the table. 


I started by sanding the entire surface down to the bare wood using my new Dewalt orbital sander.  If you are trying to take the finish off completely, its best to use a very course sandpaper until everything comes off, and then use a fine grate to smooth it out.  I used 60 to get it off, and then 200 to smooth it out afterwards.   It probably took about an hour to sand it all down.  


I then got some dark walnut stain

I used an old t-shirt, made it into a ball, and dipped it in my stain.  (I really recommend using some gloves so the stain doesn't get all over your hands.)  I rubbed the stain in sections back and forth across the table ( make sure to rub with the grain). I let each coat dry about 20 minutes before applying the next.  After applying 3 coats, I was finished with my stain.

I then painted the bottom of my table using Valspar color Secluded Garden.

I thought this would look more turquoise than it did, but I really ended up loving the color.  


I decided to use Polycrylic on the top for protection.  Since it is a table that will get a lot of wear, I put 4 coats of this on top of the stained surface.  Between coats it's best to sand the surface by hand with a very fine sandpaper.


The chairs were in pretty rough shape as you can see.  After taking the fabric off, I realized that they were made with a piece of board and foam batting, which were not cut to fit the chair.

I took all of the seats off, and spray painted Rustoleum white primer on my chairs.
After letting it dry, I painted them using the same color as the bottom of my table. I did some distressing with medium grate sand paper and sprayed each chair with polyrcrylic spray paint for protection.  I then had to cut the wood and batting to fit the chairs, and then attached the fabric with a staple gun.

This is how they looked when I finished.  I really like the gray fabric with the paint color.  

This would go perfectly in a small dining area or nook. 

I link to these parties:
Chic on a Shoestring Decorating/, Classy ClutterThe Gingerbread BlogFunky Junk InteriorsI Heart NaptimeMiss Mustard SeedFinding FabulousFive Days Five WaysShabby NestFingerprints on the FridgeCraftionary

Sunday, December 2, 2012

Living Room Furniture (Before and After)

I found these Broyhill tables on Craigslist for a good deal and had to snatch them up. I got a new sander as an early Christmas present, so I thought it would be fun to test it out on my new furniture.  I decided to prime everything except for the top with white spray paint primer.  After priming, I sanded the top surfaces down completely until I had bare wood.  After sanding the top, I got Walnut Miniwax stain and applied over the top of each piece.  Using an old T-shirt, I wiped on about 3 coats, letting each coat dry about 15 minutes in between.  I then painted the bottom using an off white color.  After painting and letting it dry about 30 minutes, i put a thin layer of the dark walnut stain over the top, and wiped off immediately to give the tables an antiqued look.  I then did a little distressing, and finished it all off with some polycrylic. 

This is how they looked before...


And this is how they looked after


Such a fun project!

Saturday, November 24, 2012

Christmas Crafts on a Budget


 For this joy sign, I used 3 small frames, chalkboard paint, ribbon, and burlap.  I took the glass out of the frames and sprayed them with Rustoleum chalkboard spray paint.  I have tried other brands of chalkboard spray paint as well as the canned paint.  My friend Hillary introduced me to this brand and I will never use anything else.  After spray painting the frames red and letting them dry, I put the glass back into the frames.  I then took a long piece of thick, red ribbon and generously hot glued it across the back of all of the frames. I made some burlap rosettes and glued those on using hot glue as well.    With some chalk and stencils, it makes a cute little holiday sign! Total cost for this project ended up being about $3.

For this sign, I decided to use an old cabinet door that I found at Habitat for Humanity for $2.  I stained the entire thing using dark walnut miniwax stain.  After letting the stain dry overnight, I painted white on top.  I then used stencils to add the letters, did some distressing, and added black knobs from Hobby Lobby that cost me $2 each. It ended up costing $12 after I was finished.  This is a great way to hang stockings if you don't have a fireplace.


This was an old picture that I found at a garage sale for three dollars.  I added some green paint on the outside frame, and painted chalkboard paint onto the glass. Total cost including the paint was about $5.


I was so excited to find these little shutters at a garage sale for a few dollars.  I primed them white, and then brush painted over them.  Perfect place to put Christmas cards!

I link to these awesome parties:
Classy ClutterI Heart NaptimeThe Gingerbread BlogBe Different Act NormalPositively SplendidBetween naps on the porchC.R.A.F.T.Homemaker on a DimeBoogie Board CottageSouthern LovelyVintage GwenDIY by DesignEmbracing ChangeChic on a Shoestring DecoratingDixie and DottieFinding FabulousFive Days Five WaysAt the Picket FenceCraftionaryNaptime Crafters

Sunday, October 7, 2012

Turquoise Dresser Redo

I found this dresser at a garage sale for $50.  I decided to paint it using Venetian Turquoise from Glidden.  I started by sanding everything down very lightly.  I took the hardware out and spray painted it black.  I then gave the entire dresser 2 coats of paint, and then let it dry.  I then painted some Miniwax Ebony stain over the top and wiped off using a wet rag. I didn't wipe the stain from the grooves because I thought it looked better that way. After letting it all dry, I put a coat of polyurethane over the top for protection. I love this color and I think I'll use it for future projects!


 BEFORE


 AFTER


If you're new to my blog, I'd love for you to become a follower or like me on Facebook.  Thanks for stopping by!

I link to these awesome parties:
Classy ClutterCraft EnvyThe Gingerbread BlogFunky Junk InteriorsI Heart NaptimeHey What's for Dinner Mom?Be Different Act NormalPositively SplendidCRAFTHomemaker on a DimeBoogie Board CottageBetween Naps on the PorchSkip to My LouSarah Dawn DesignsA Diamond in the StuffDIY by DesignSouthern LovelyVintage GwenChic on a ShoestringFinding FabulousFive Days Five WaysThe Shabby NestCraftionaryGingerbreadFunky Junk InteriorsWT Fab

Chair Makeovers (Before and After)


BEFORE


AFTER

Related Posts Plugin for WordPress, Blogger...