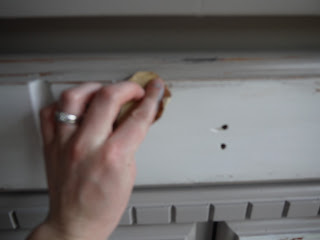
There are a ton of different techniques you can use to paint furniture. I painted this gray and white dresser using just a few simple steps.
I found this at a garage sale and it was pretty scuffed up, but looked like it had some potential. I loved the fact that it was very solid wood. Let me tell you...this dresser was a piece of work!
Here's what I did to fix it up a bit....
I first took out all of the drawers and sanded them lightly with my electric sander, just enough to rough it up. You can also sand it by hand, but an electric sander speeds up the process. After sanding, take a rag and wipe down everything really well. Sometimes if there are pieces of dirt or old sticker residue, it can show up after you paint. I chose to not prime this dresser because I'm going for a more distressed look. Sometimes i do it, and sometimes I don't depending on what type of look I want for my furniture.
Now you're ready to paint! Apply a coat of paint onto the wood and let it dry for at least an hour. After the first coat dries, apply another. For these drawers I painted the front white with gray edges. I used a semi-gloss finish for both colors. You can actually buy paint samples at lowes for $3, which I do all of the time when I'm trying out new colors. It allows me to test out a wide variety of paint for super cheap.

While waiting for my drawers to dry, I spray painted my hardware yellow.
Now it's time to distress it! I love to use stain to distress my furniture, however there are so many other ways to distress as well. After letting your paint dry for at least an hour, you can add a layer of dark stain. I either use dark walnut or Ebony Black Miniwax stain. I would recommend buying the small sized stain so you try it to see if you like it. After applying the stain evenly over your surface, immediately take a wet rag or old t shirt and wipe as little or as much stain off as you would like. In the process, some of your paint may come off, which will give a more shabby and distressed look. It's best to not let the stain sit for very long, or it will soak into the wood and will be harder to get off. I also took a piece of sandpaper and roughed up a few of the edges.
Now you'll want to allow everything to dry for at least 24 hours before applying a coat of polycrylic to protect your piece of furniture.
This is how it turned out when I finished...or when I thought I was finished. When I bought it, I knew I would be needing new tracks for 2 of the drawers, but what I didn't know was that nobody carries 15 inch tracks. So after trying 3 different sizes I finally gave up and decided to get rid of the drawers make shelves instead.
I added a couple of baskets, and this was my end result!
Before
After
If you are new to my blog I would love for you to become a follower or like me on Facebook. Thanks so much for visiting!
Linking to these parties:
The 36th Avenue, Somewhat Simple, Finding Fabulous, Chic on a Shoestring Decorating, At the Picket Fence, Shabby Nest, Craftionary, The Shabby Creek Cottage, House of Hepworths, Tip Junkie, Classy Clutter. I Heart Naptime, Positively Splendid, Be Different Act Normal, Gingerbread, Craft Envy, The Grant Life, Serendipity and Spice, C.R.A.F.T., Homemaker on a Dime, Debbiedoos


Great makeover! I never think about taking out drawers to make shelves, but it looks so neat that way. Thanks for stopping by my blog and becoming a follower. I'm following you now. :)
ReplyDeleteHi! Visiting from I heart nap time. OH my goodness! I love this makeover! The colors you used are perfect.. and the aged effect is awesome! I want one just like it :)
ReplyDeleteIf you get a chance I would love for you to share this (and any other awesome posts you have) at my link party!
http://www.thegrantlife.com/2012/08/financial-friday-fabulous-features.html
You did a wonderful job transforming this dresser! I've never used stain to age a piece, but it's a great tip! I'm now following you...
ReplyDeleteSaw you at Debbiedoo's Newbie Party
Debbie :)
This is a great makeover. You did a wonderful job!
ReplyDeleteI absolutely love how you spray painted the hardware yellow! What a fun touch!
ReplyDeleteAngela
I like your blog a lot. Its informative and full of information. Thank you for sharing.
ReplyDeleteAirless Sprayer